|
|
|
|
Easy way to
make
non-slip surfaces
Walking on smooth metal surface can be dangerous, even if it is coated with ordinary paint, as it is very easy to slip. Walking on smooth sloped metal surface is even more dangerous. Walking on smooth sloped metal surface that is placed a few feet above ground is just unwise. But walking on wet smooth sloped metal surface placed a few feet above ground is almost a suicide! Now imagine that you are a tank commander of M60 tank and for some reason you have to stand on your feet on top of the turret during the rain... I'm sure that hundreds of ribs, legs and arms were broken when people fell down from those and other tanks. The solution was found in the use of non-slip surfaces that are now applied on armor of most modern armored vehicles. Usually it is a non-slip compound that is applied using a spray gun onto the metal surface.
Model manufacturers try to replicate the non-slip surfaces in scale on their models - with varied results. Sometimes it is almost lifelike - like in Tamiya Leopard 2A5, sometime it seems overdone - like on Italeri M1A2 Abrams. But unfortunately quite often it is completely missing. One example are all Tamiya models of Abrams tank, including the new M1A2 kit, another are all their Bradley models.
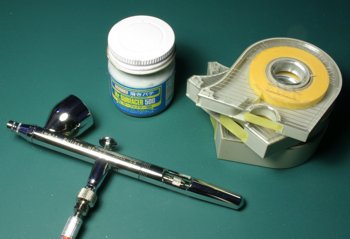
I discovered an easy way how to add your own "in scale" non-slip surfaces to your models. It is so simple that I'm sure someone did it before, but I've never heard about it. As is often the case when you try to get the most realistic effects in your models, the best way is to try to copy the real world! You need two things: spray gun and a non-slip compound. In modeling world you actually need four things: airbrush, compressor, some masking tape and... Mr. Surfacer 500. The best airbrush would be the one with gravity feed of paint - it is the easiest to clean (very important!) and it is possible to spray thick liquids through it, that may not want to "cooperate" in bottom feed airbrush. Probably the bigger the nozzle diameter the better, but I used 0.35 mm nozzle with great results. Compressor is required, because we need high pressure, that may not be available from spray cans.
You apply the non-slip surface in three easy steps:
1. Apply masking tape on your model, so that only areas where the non-slip surface should be remain uncovered.
2. Spray UNDILUTED Mr. Surfacer 500 through your airbrush onto the model. You need to use high pressure - I used about 40 psi to make it work. Try to adjust the pressure, so that you get the correctly looking non-slip surface. Too low pressure and too large particles of Surfacer will be applied. Too high pressure and you may get too smooth surface. Just try it on some spare piece of plastic first. This may be the first time when you actually want your airbrush to start heavily splatter!
3. Well, remove masks and you are actually done with the non-slip surface application. Depending on the way you applied the masking tape, you may need to brush away the excess Mr. Surfacer dust from the edges of your non-slip surfaces. No worries though - soft brush will remove all dust build-up and leave Mr. Surfacer only where you wanted it to be! Give it a day or more and you may overcoat it with your favorite model paint. Just avoid applying too wet coats or the thinner may dissolve Mr. Surfacer. But the real third step in making the non-slip surface is cleaning your airbrush. Mr. Surfacer 500 is thick and may not be easy to clean off the airbrush - and you have to do it quickly as it dries fast. That's why I suggested using gravity feed airbrushes - they are easiest to clean. I use Iwata Eclipse HP-CS. You can use Gunze Mr. Thinner to clean your airbrush, but much cheaper option is using regular lacquer (cellulose) thinner.

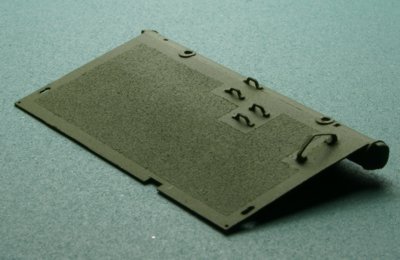
Gray area is Mr. Surfacer 500.
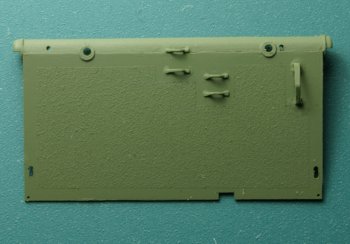
After painting with Tamiya acrylic paint.
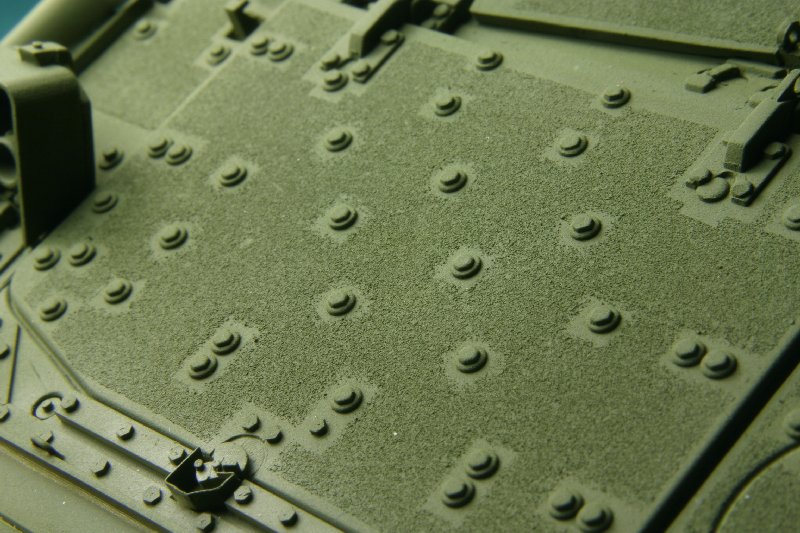
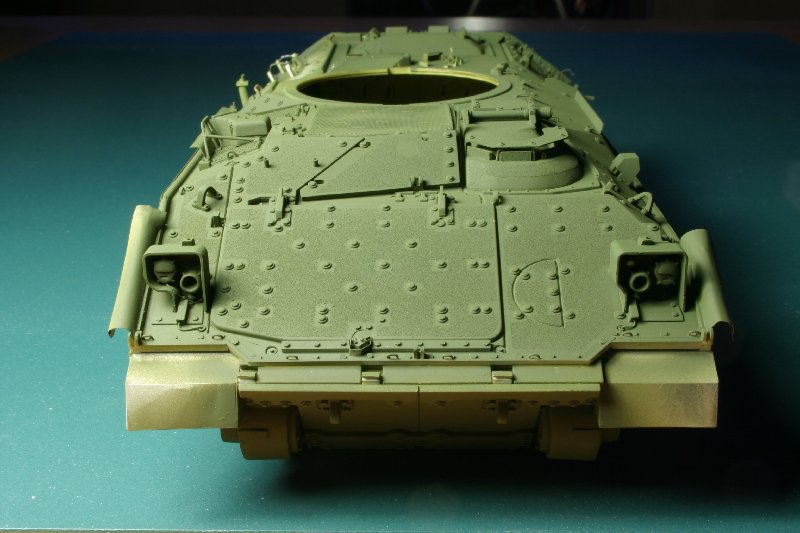
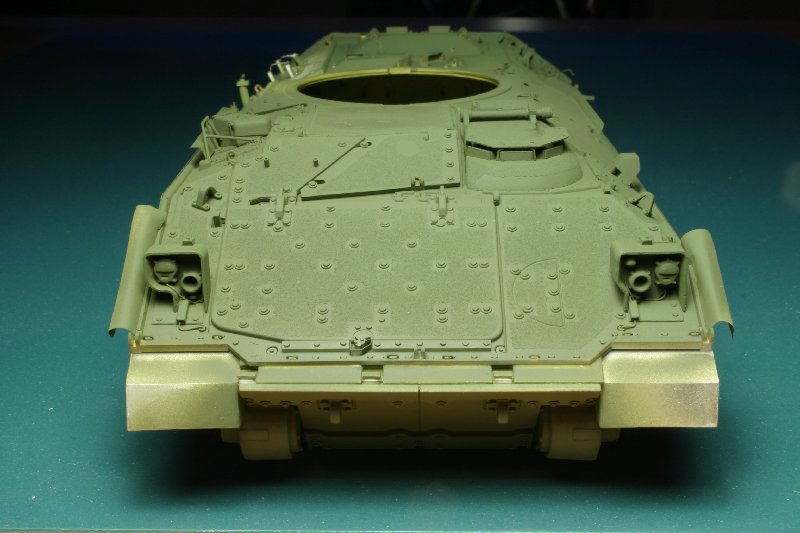
The non-slip surface becomes more visible in some lighting
conditions.
Exactly as in the real world!
 |
 |
 |
| Effect varies heavily with the lighting. Click on each picture to enlarge. | ||
|
|
||
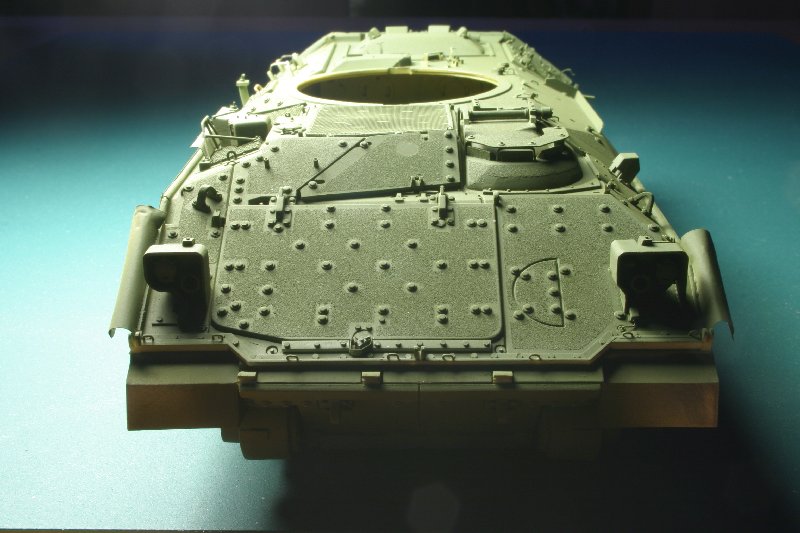
|
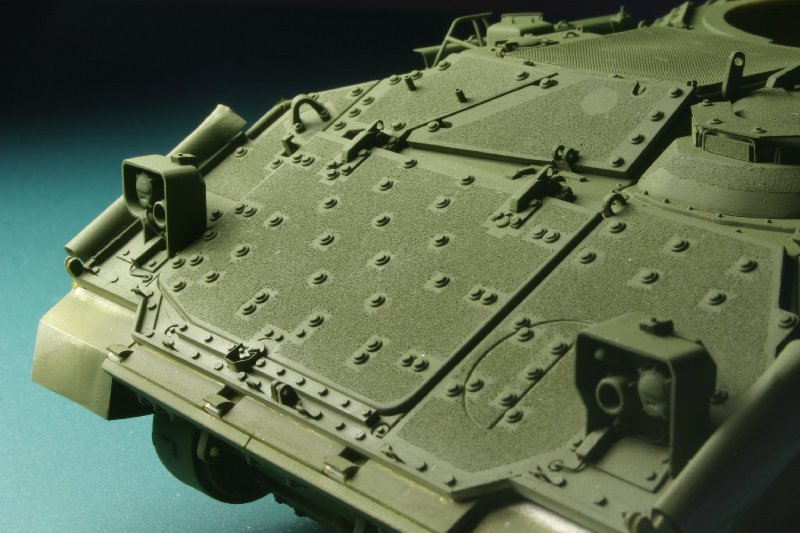
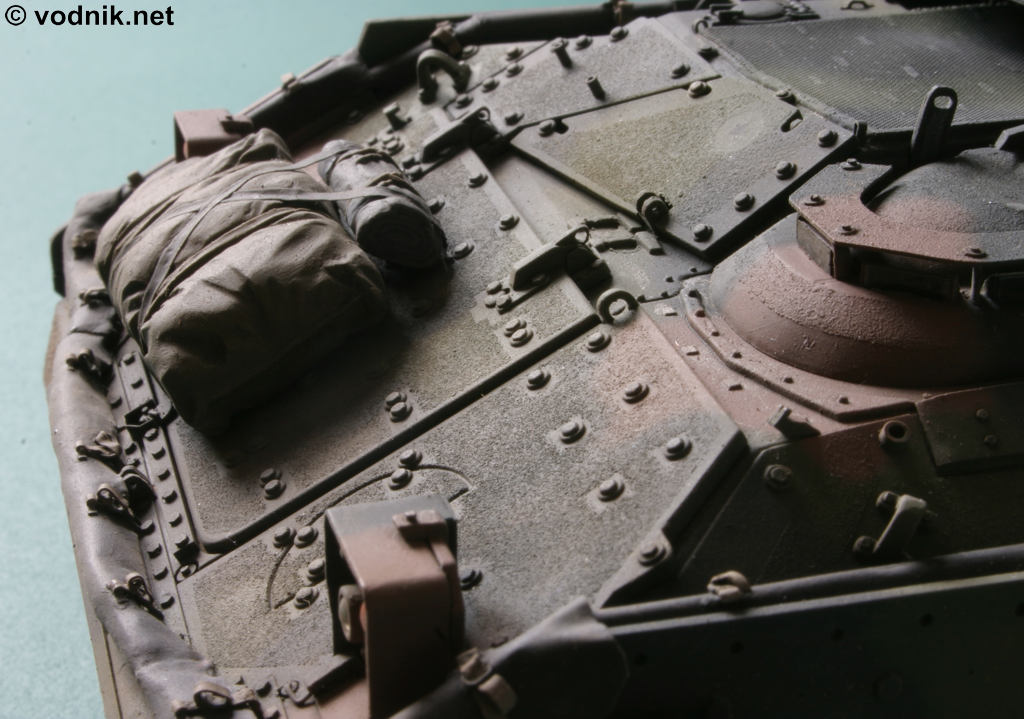
Close-up of the surface. Click on the picture to enlarge. |
||
 |
 |
|
Results on finished model. Click on the picture to enlarge. |
|
Happy modeling everyone!
![]()
![]()
![]()
Copyright © 2004 VODNIK, mailto:pawel@vodnik.net